Maintenance
Wireless MPG Maintenance and Troubleshooting - Keep Your Controls Working
AMAG Team7 min read
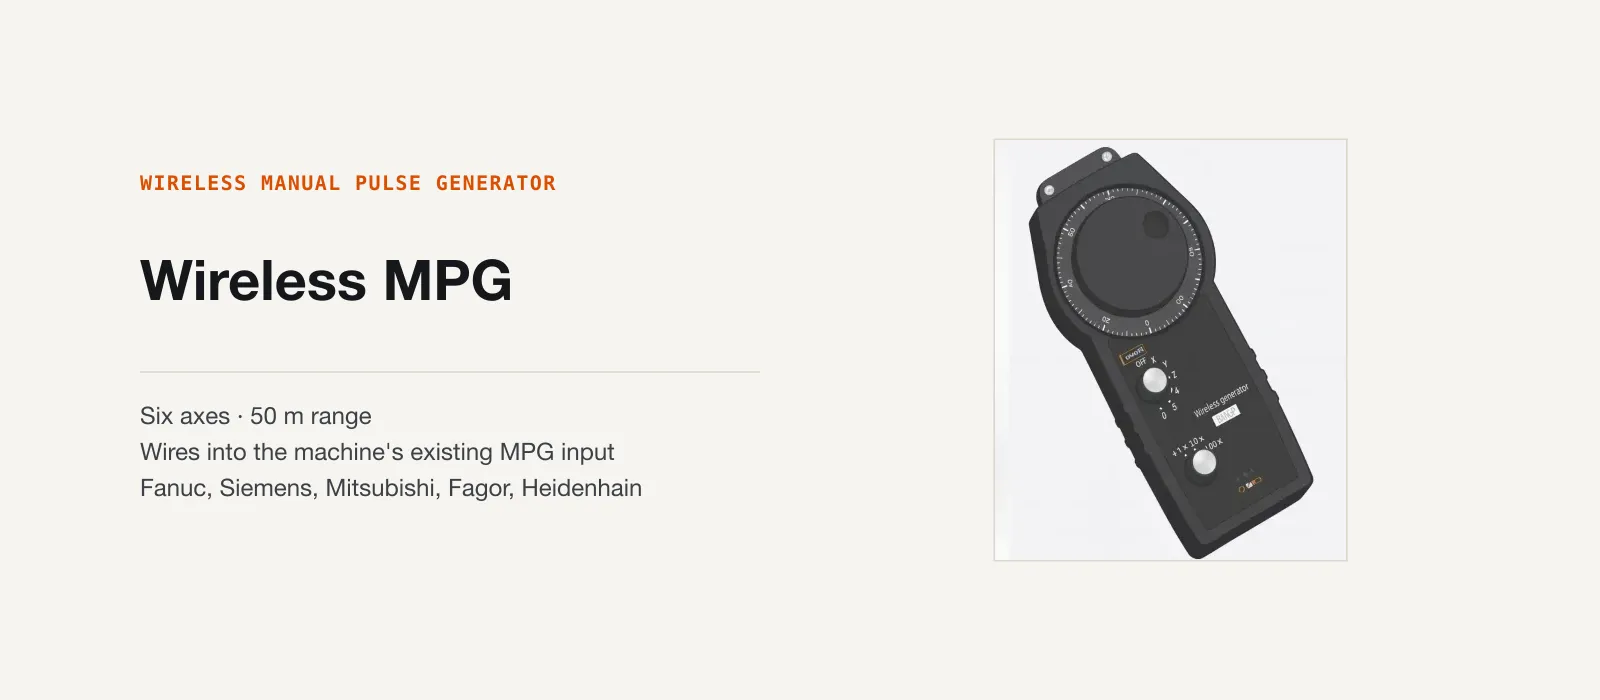
Wireless MPG systems are remarkably reliable, but like any electronic equipment, they benefit from routine care. This guide covers the maintenance and troubleshooting that's specific to the pendant and receiver as hardware: housing, buttons, connections, and the fault signatures that point at the transmitter rather than the radio link. For RF interference, antenna placement, and battery care, our shop-floor RF reliability guide is the fuller, more current reference; this post doesn't repeat it.
Preventive Maintenance Schedule
Daily Checks (Beginning of Each Shift)
-
Power-On Check
- Power on the pendant and confirm it responds to the first button press
- A pendant that's sluggish or unresponsive on the first try is worth a closer look before the shift gets busy
-
Physical Inspection
- Look for visible cracks, chips, or damage to the transmitter housing
- Check for bent or corroded antenna
- Ensure buttons and the axis-select and step-multiplier switches respond with consistent, positive clicks
- Verify no liquids or debris on device surfaces
-
Machine Safety Chain Check
- The pendant carries no emergency stop or enable switch of its own; the machine's own control panel is the entire safety chain
- Confirm the machine's e-stop and safety interlocks stop the machine as expected before relying on the pendant for the shift
Weekly Maintenance
-
Clean Transmitter Housing
- Wipe down exterior with a dry, soft cloth
- Use a slightly damp cloth for stubborn dirt, avoiding excess moisture
- Pay special attention to button areas and switch bezels where dust and swarf accumulate
-
Receiver Mounting and Connections
- Visually inspect the receiver for dust accumulation
- Check mounting brackets for looseness
- Verify the cable back to the control panel is securely connected at both ends
- (Where the receiver sits and how its cable is routed is a placement question, covered in the RF reliability guide, not repeated here)
Monthly Checks
- Functional Test
- Test all axis controls in manual mode
- Verify increment selections (×1 / ×10 / ×100) work correctly
- Check rapid traverse and feed rate override buttons
- Confirm switch detents feel positive and consistent, with no sticking
Common Issues and Solutions
Issue 1: Transmitter Won't Power On or Respond
Symptoms:
- No response when pressing any button
Causes & Solutions:
| Cause | Solution |
|---|---|
| Power source depleted | See the battery section of the RF reliability guide |
| Power button stuck or fouled | Check for debris around the button, clean gently |
| Internal fault | Contact us for warranty service; the pendant carries our standard 1-year warranty from date of invoice |
Issue 2: Axes Moving in the Wrong Direction
Symptoms:
- X-axis moves left instead of right (or vice versa)
- Y or Z axes similarly reversed
- Some axes correct, others reversed
Causes & Solutions:
| Cause | Solution |
|---|---|
| CNC parameter configuration error | Review the axis direction settings in the machine's own parameters; wiring differs by controller platform (Fanuc, Siemens, Mitsubishi Electric, Fagor, Heidenhain), see our controller integration guide |
| Receiver module installation error | Verify the receiver is wired into the correct terminals on the machine's existing MPG input |
| Controller-side glitch | Restart the CNC control and test again before concluding it's a hardware fault |
Issue 3: Button or Switch Response is Sluggish
Symptoms:
- Delay between button press and axis movement
- Need to press multiple times for a response
- Some buttons or switches work, others don't
Causes & Solutions:
| Cause | Solution |
|---|---|
| Worn button or switch contacts | Contact us for repair or replacement under warranty |
| Debris or swarf under buttons | Carefully clean around button and switch edges |
| Power source low | See the RF reliability guide |
For dropped signal, dead zones, or range that's fallen short of the rated 50 m, the cause is almost always RF interference or receiver placement rather than the transmitter itself. Our shop-floor RF reliability guide covers the noise sources a shop floor throws at a radio link, where the receiver and antenna belong, and how to run an acceptance test that finds dead spots before they find you.
Mechanical Wear Items
The pendant is a handheld device that lives in gloved hands and occasionally gets set down on a machine bed or dropped, so mechanical wear shows up before electronic failure on most units:
- Buttons and switches: the axis-select and step-multiplier switches take the most cycles of any control on the pendant. A switch that's lost its positive detent, or clicks through positions inconsistently, is a wear item worth reporting rather than working around.
- Housing: hairline cracks near the battery or connector access points are the usual failure point on a dropped pendant. A crack that's let moisture or coolant mist inside is a reason to stop using the unit, not clean around it.
- Receiver cable and connector: the cable between the receiver and the machine's MPG input takes wear at the strain relief if it's not secured, the same failure mode a wired handwheel has, just moved one connector back. Check it's clipped down rather than hanging loose.
Storage
For a spare pendant kept for a second machine on the same cell, or a unit taken out of service temporarily, keep it somewhere dry and out of direct exposure to coolant mist or wash-down spray, in the same conditions you'd store any handheld shop electronics. Wipe it down before putting it away, since dried coolant residue on the housing and buttons is easier to prevent than to clean off later. For anything power-related in storage, see the RF reliability guide.
When to Contact Technical Support
Reach out to our technical team if you experience:
- Persistent malfunction that survives the checks above
- Hardware damage from physical impact or moisture ingress
- Wiring or compatibility questions when integrating with a control platform not covered in our controller integration guide
- Warranty service: the pendant and receiver carry our standard 1-year warranty from date of invoice against manufacturing defects; claims are settled by returning the item to our works to establish the cause of failure
Maintenance Log Template
Keep records of maintenance activities:
Date: ___________
Maintenance Type: ☐ Daily ☐ Weekly ☐ Monthly

Physical Condition: ☐ OK ☐ Issue Noted
Button/Switch Response: ☐ OK ☐ Issue Noted
Issues Found: _______________________
Actions Taken: _______________________
Next Check Date: ___________
Technician: _______________________
Conclusion
Wireless MPG systems need less maintenance than a wired pendant, but the maintenance they do need is easy to skip precisely because the system usually still works right up until it doesn't. The daily power-on and housing check, the weekly connection check, and the monthly functional test above catch mechanical and wiring issues while they're still a two-minute fix instead of a shift-stopping one.
For anything to do with RF interference, receiver and antenna placement, or battery and power care, our shop-floor RF reliability guide is the fuller reference; work through it first if the symptom looks like a radio problem rather than a mechanical one. For anything the guides above don't resolve, or for warranty service, contact our technical team with your maintenance log and we'll take it from there.
Related articles
Maintenance
Keeping Wireless Controls Reliable on a Noisy Shop Floor
Why machine shops are hard on radio links, and how receiver placement, cable routing, and honest battery habits keep a wireless pendant dependable.
Maintenance
Commissioning a Lubrication System: From First Fill to First Cycle
A step-by-step commissioning sequence for centralised lubrication, from a clean first fill to proven oil delivery at every single point.
Maintenance
Troubleshooting a Centralised Lubrication System, Fault by Fault
A symptom-first guide to centralised lubrication faults: pressure problems, dry points, stalled progressive blocks, and alarms that never fire.