Maintenance
Keeping Wireless Controls Reliable on a Noisy Shop Floor
AMAG Team7 min read
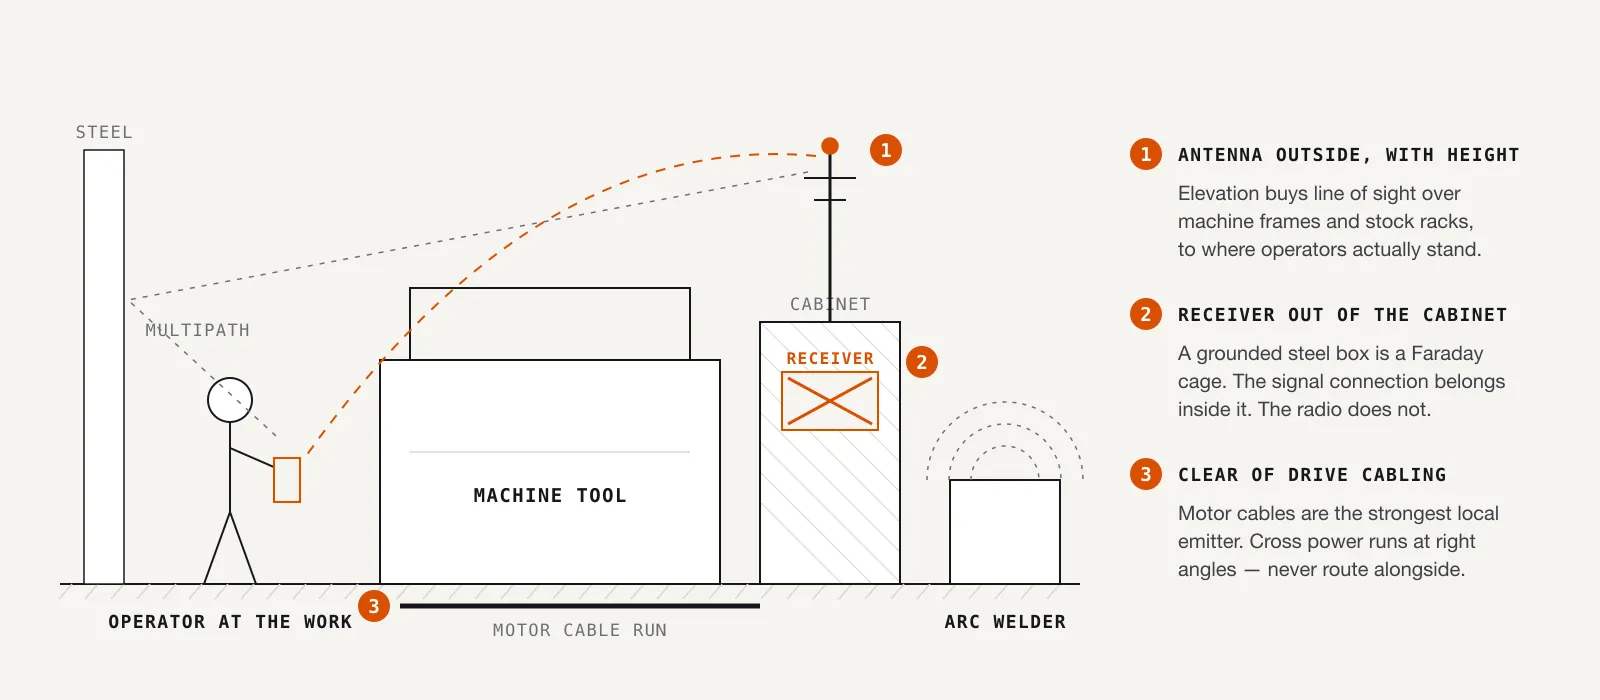
A machine shop is close to a worst-case environment for radio. Pretending otherwise is how wireless controls get a bad name: a pendant installed carelessly drops out at the worst moment, and the shop concludes wireless doesn't belong on a machine tool. The honest version is different. The physics of a shop floor is hostile in specific, well-understood ways, and an installation that respects them turns out to be dependable.
What the floor throws at a radio
Start with the noise sources. An arc or TIG welder is a broadband emitter: the arc is an electrical discharge that sprays energy across a wide swath of spectrum, which is why a welder striking up nearby can be heard on almost any radio device.
Variable frequency drives and servo drives are the second family. A modern drive switches power transistors hard on and off thousands of times per second, and every sharp edge is rich in high-frequency content that radiates from the motor cabling, which acts as an unintentional antenna running across the machine and often the building. A shop full of CNC machines runs these emitters all day.
Then there's the building itself. A shop is steel: columns, machine frames, cabinets, racking, stock, and steel reflects radio waves. A floor dense with reflectors produces multipath, where a signal arrives by several routes at once and the copies interfere. That produces dead spots, positions where the link is poor even though a spot a metre away is fine. Multipath is why "it worked when we tested it at the bench" tells you little about how it behaves beside the machine.
The mistake that outranks all interference
Before any welder or drive gets a vote, one installation decision dominates everything else: where the receiver goes. The single most common mistake is mounting it inside the machine's steel electrical cabinet, next to the control, because that's where the wiring is convenient.
A grounded steel box is a Faraday cage. That's not a figure of speech: excluding electromagnetic fields is what a conductive enclosure does, which is part of why electrical cabinets are steel in the first place. A receiver mounted inside one is a radio placed inside a shield, its range throttled before any interference source in the building even gets involved. Installations with "terrible range" very often have exactly this configuration, and no amount of fiddling elsewhere fixes it.
The signal connection belongs inside the cabinet. The radio does not.
Where the receiver and antenna belong
Put the receiving antenna outside the enclosure and give it height. Elevation buys line of sight over the clutter of machine frames and stock racks. Think about where operators actually stand during setup: at the vice, the spindle, the far corner of the table. The antenna should have as clear a path as possible to those positions, not to the aisle the installer happened to be standing in.
Keep the receiver and its antenna away from the drive output cabling. Motor cables are the strongest local emitters on the machine, and distance is the cheapest mitigation there is. The same applies to the receiver's cable run back to the control: route it away from servo power runs. Two cables lying parallel in a shared tray for metres act as a transformer, inducing noise from the power run onto the signal run. Cross power cabling at right angles if you must. Don't run it alongside.
Finally, use the standard mitigations, because they're standard for a reason: shielded cable with the shield properly grounded, grounding done deliberately rather than by accident, and ferrite sleeves on cable ends where noise needs suppressing. None of this is exotic; it's the same hygiene that protects every other signal cable on the machine.
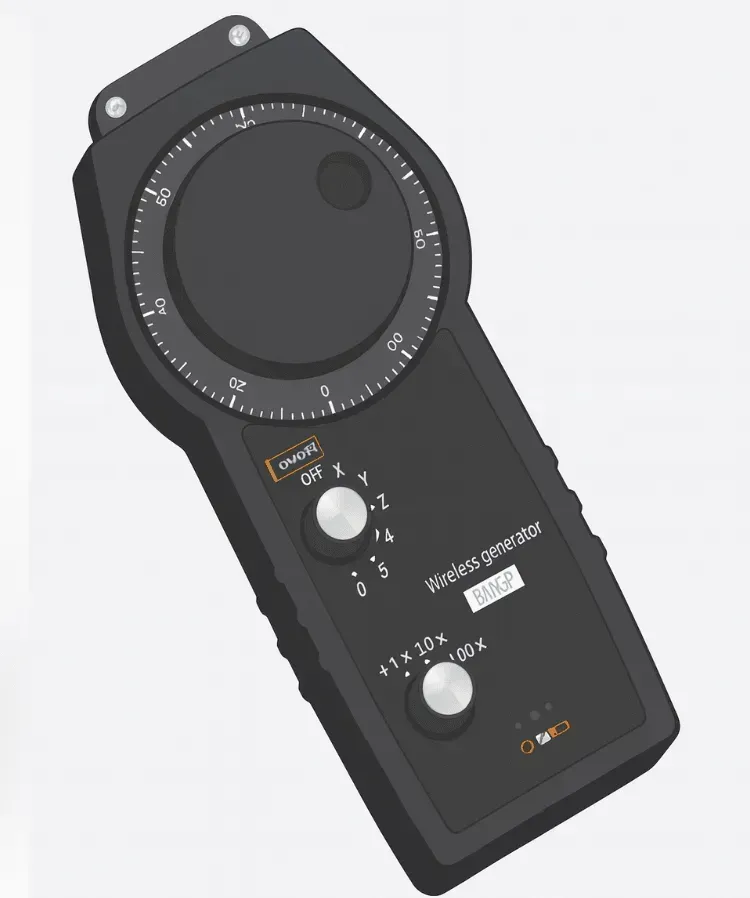 The receiver is the half that goes outside the steel cabinet; the pendant is the half that goes wherever the operator needs to stand.
Prove it before you trust it
After installation comes the step most shops skip: an acceptance test. Put the machine in a safe state, no tool, no part, nothing to hit, and command a test move while you walk the entire working area with the pendant live. Stand everywhere an operator would plausibly stand: both ends of the table, behind the fixture, at the tool changer, the far corner of the bed. You're mapping the coverage now, deliberately, rather than discovering it later during a setup that matters.
If you find a dead spot, you've learned something valuable at zero cost. Either the antenna placement needs adjusting, or that position gets marked as a known limit, and both outcomes beat finding it by surprise mid-job. Repeat the walk with the shop running normally, drives on, spindles turning, since the quiet-Sunday version of the test flatters the installation and tells you less than you'd think. For where this fits into day-one workflows, see our post on setup work with a wireless MPG.
Batteries, without the folklore
The pendant's other lifeline is its battery, and it's the simplest part of the whole system: standard, user-replaceable AA batteries, lasting roughly 30+ days on a set depending on usage. There's no charger and no charge state to manage.
The only real discipline is keeping a spare set where the machine is, not in a drawer across the shop. A pendant that goes flat mid-setup is a 30-second fix if the spares are at hand and a shift-stopping annoyance if they're not.
A pre-shift ritual that takes one minute
Wireless adds a small daily discipline. At shift start, power the pendant on and confirm it responds immediately. Work the buttons and selector switches and confirm they feel right, with no sticking. Glance over the housing for cracks, since a pendant lives in hands and occasionally on floors. That's the whole ritual. It costs a minute, and it moves failures from mid-setup surprises to before-work findings. Our wireless MPG maintenance guide covers the longer-interval care items beyond this daily check.
When it stops being your problem
Some symptoms are installation problems, and this post is the checklist for those. Others are support calls. A reproducible dead zone that survives sensible antenna repositioning is worth reporting rather than tolerating. So is degradation over time when nothing visible has changed: range that used to cover the bay and no longer does, or dropouts appearing in spots your acceptance walk originally mapped as clean. "Nothing changed but the behaviour changed" is exactly the situation where a second set of eyes earns its keep.
The AMAG Wireless MPG carries a 1-year warranty, so the economics of that call are straightforward: report early, with the symptom described concretely, and let support tell you whether it's placement, environment, or hardware.
Earned reliability
Wireless on a shop floor is neither fragile magic nor a guaranteed appliance. It's a radio link in a hard environment, and it repays the care it's given. Shops that do the work above get a pendant they stop thinking about. If you're planning an installation or chasing a link problem you can reproduce, contact us and we'll help you work through it.
Related articles
Maintenance
Commissioning a Lubrication System: From First Fill to First Cycle
A step-by-step commissioning sequence for centralised lubrication, from a clean first fill to proven oil delivery at every single point.
Maintenance
Troubleshooting a Centralised Lubrication System, Fault by Fault
A symptom-first guide to centralised lubrication faults: pressure problems, dry points, stalled progressive blocks, and alarms that never fire.
Maintenance
Wireless MPG Maintenance and Troubleshooting - Keep Your Controls Working
Routine housing, button and switch care for a wireless MPG pendant, plus fault signatures that trace to the hardware, not the radio link or a dead AA battery.